Mitosis Keyboard First Impressions
Mitosis Keyboard First Impressions
I’ve received my Mitosis a few days ago and I like it a lot so far:
- The size: perfect for the 36 keys layout I use
- The shape: very comfortable, lowered outer columns feel great for pinkies
- I wished the inner column, for the index finger would not be shifted up as it is, it causes a bit of extension to use Y and T (not a big deal though)
- I also think the bottom thumb row is too far, so I am using the top row, having the bottom one without keycaps, so it doesn’t get in a way
- Wireless: probably this was one of main reasons to get it, it is really nice to freely move both halves without having to care about wires
- An interesting decision here is to use the radio channel instead of bluetooth which gives much longer battery lifetime
- It requires a receiver to be connected to the computer, but that is not a big deal, also it is cool to realize that your keyboard (QMK) is actually running inside that small board
- Layout: not sure which layout was there initially, it was QWERTY while the default layout in QMK configuratior is Maltron (I think), anyway, I changed it to my layout, similar to what I have on Moonlander
- Open source: here is the announcement post, hardware, receiver firmware and keyboard firmware, QMK
How it looks:

and the receiver:

Getting it to work didn’t take much time, although I first had an issue with the cable (the first one I tried didn’t work, probably it was just not a data cable) and then I had batteries upside down and one of them didn’t hold in place.
I wish there was some quick start guide, something like this:
- Unscrew PCBs from the case (inner screws)
- Put batteries into the left and right halves, they go between top and bottom plates, right bottom corner of the right half and left bottom corner of the left half
- Note that battery position is different in left and right halves
- Don’t screw the PCB back yet, first make sure it works
- Find a micro-USB to USB-A/USB-C cable, it should be the data cable (so some cables may not work)
- Connect the receiver to a computer
- Try pressing keys on both halves, it should already work
- Screw the PCB back into the case
- Put on keycaps (it goes without keycaps)
If it doesn’t work:
- Make sure to use a data cable for the receiver
- Make sure the batteries are inserted with the correct polarity
- There are
+and-markings although I had to put my batteries upside down (+battery side facing-marking), not sure if markings are misplaced or I am interpreting them incorrectly
- There are
Flashing:
- Go to the QMK configuratior, change the layout as you like
- Download json keymap (at least, for the backup, it can be loaded back later)
- Compile and download the firmware (there are buttons in the configurator) and then flash it with the QMK Toolbox
- Press the button with
Rnear it on the receiver to reset it and go to the flashing mode
Alternatively, clone qmk and flash from the command line.
Setup guide is here, after everything is set up, new firmware can be compiled and flushed with qmk flash -kb mitosis -km mitosis_mini (where mitosis_mini is the custom keymap name, there are also several alternative keymaps in the QMK source).
The keymap itself, can remain in json format, here is what I have so far:
- config.h - defines to auto shift timeout and enables tapping force hold
- custom.c - led colors for layers (although, I have a problem with green light)
- keymap.json - the keymap made with QMK configurator
- rules.mk - enables auto shift
Compared to the ZSA configurator, the QMK Configurator provides less features, so I had to switch to the source code to enable auto shift.
I still have a few questions, maybe someone could answer these for me:
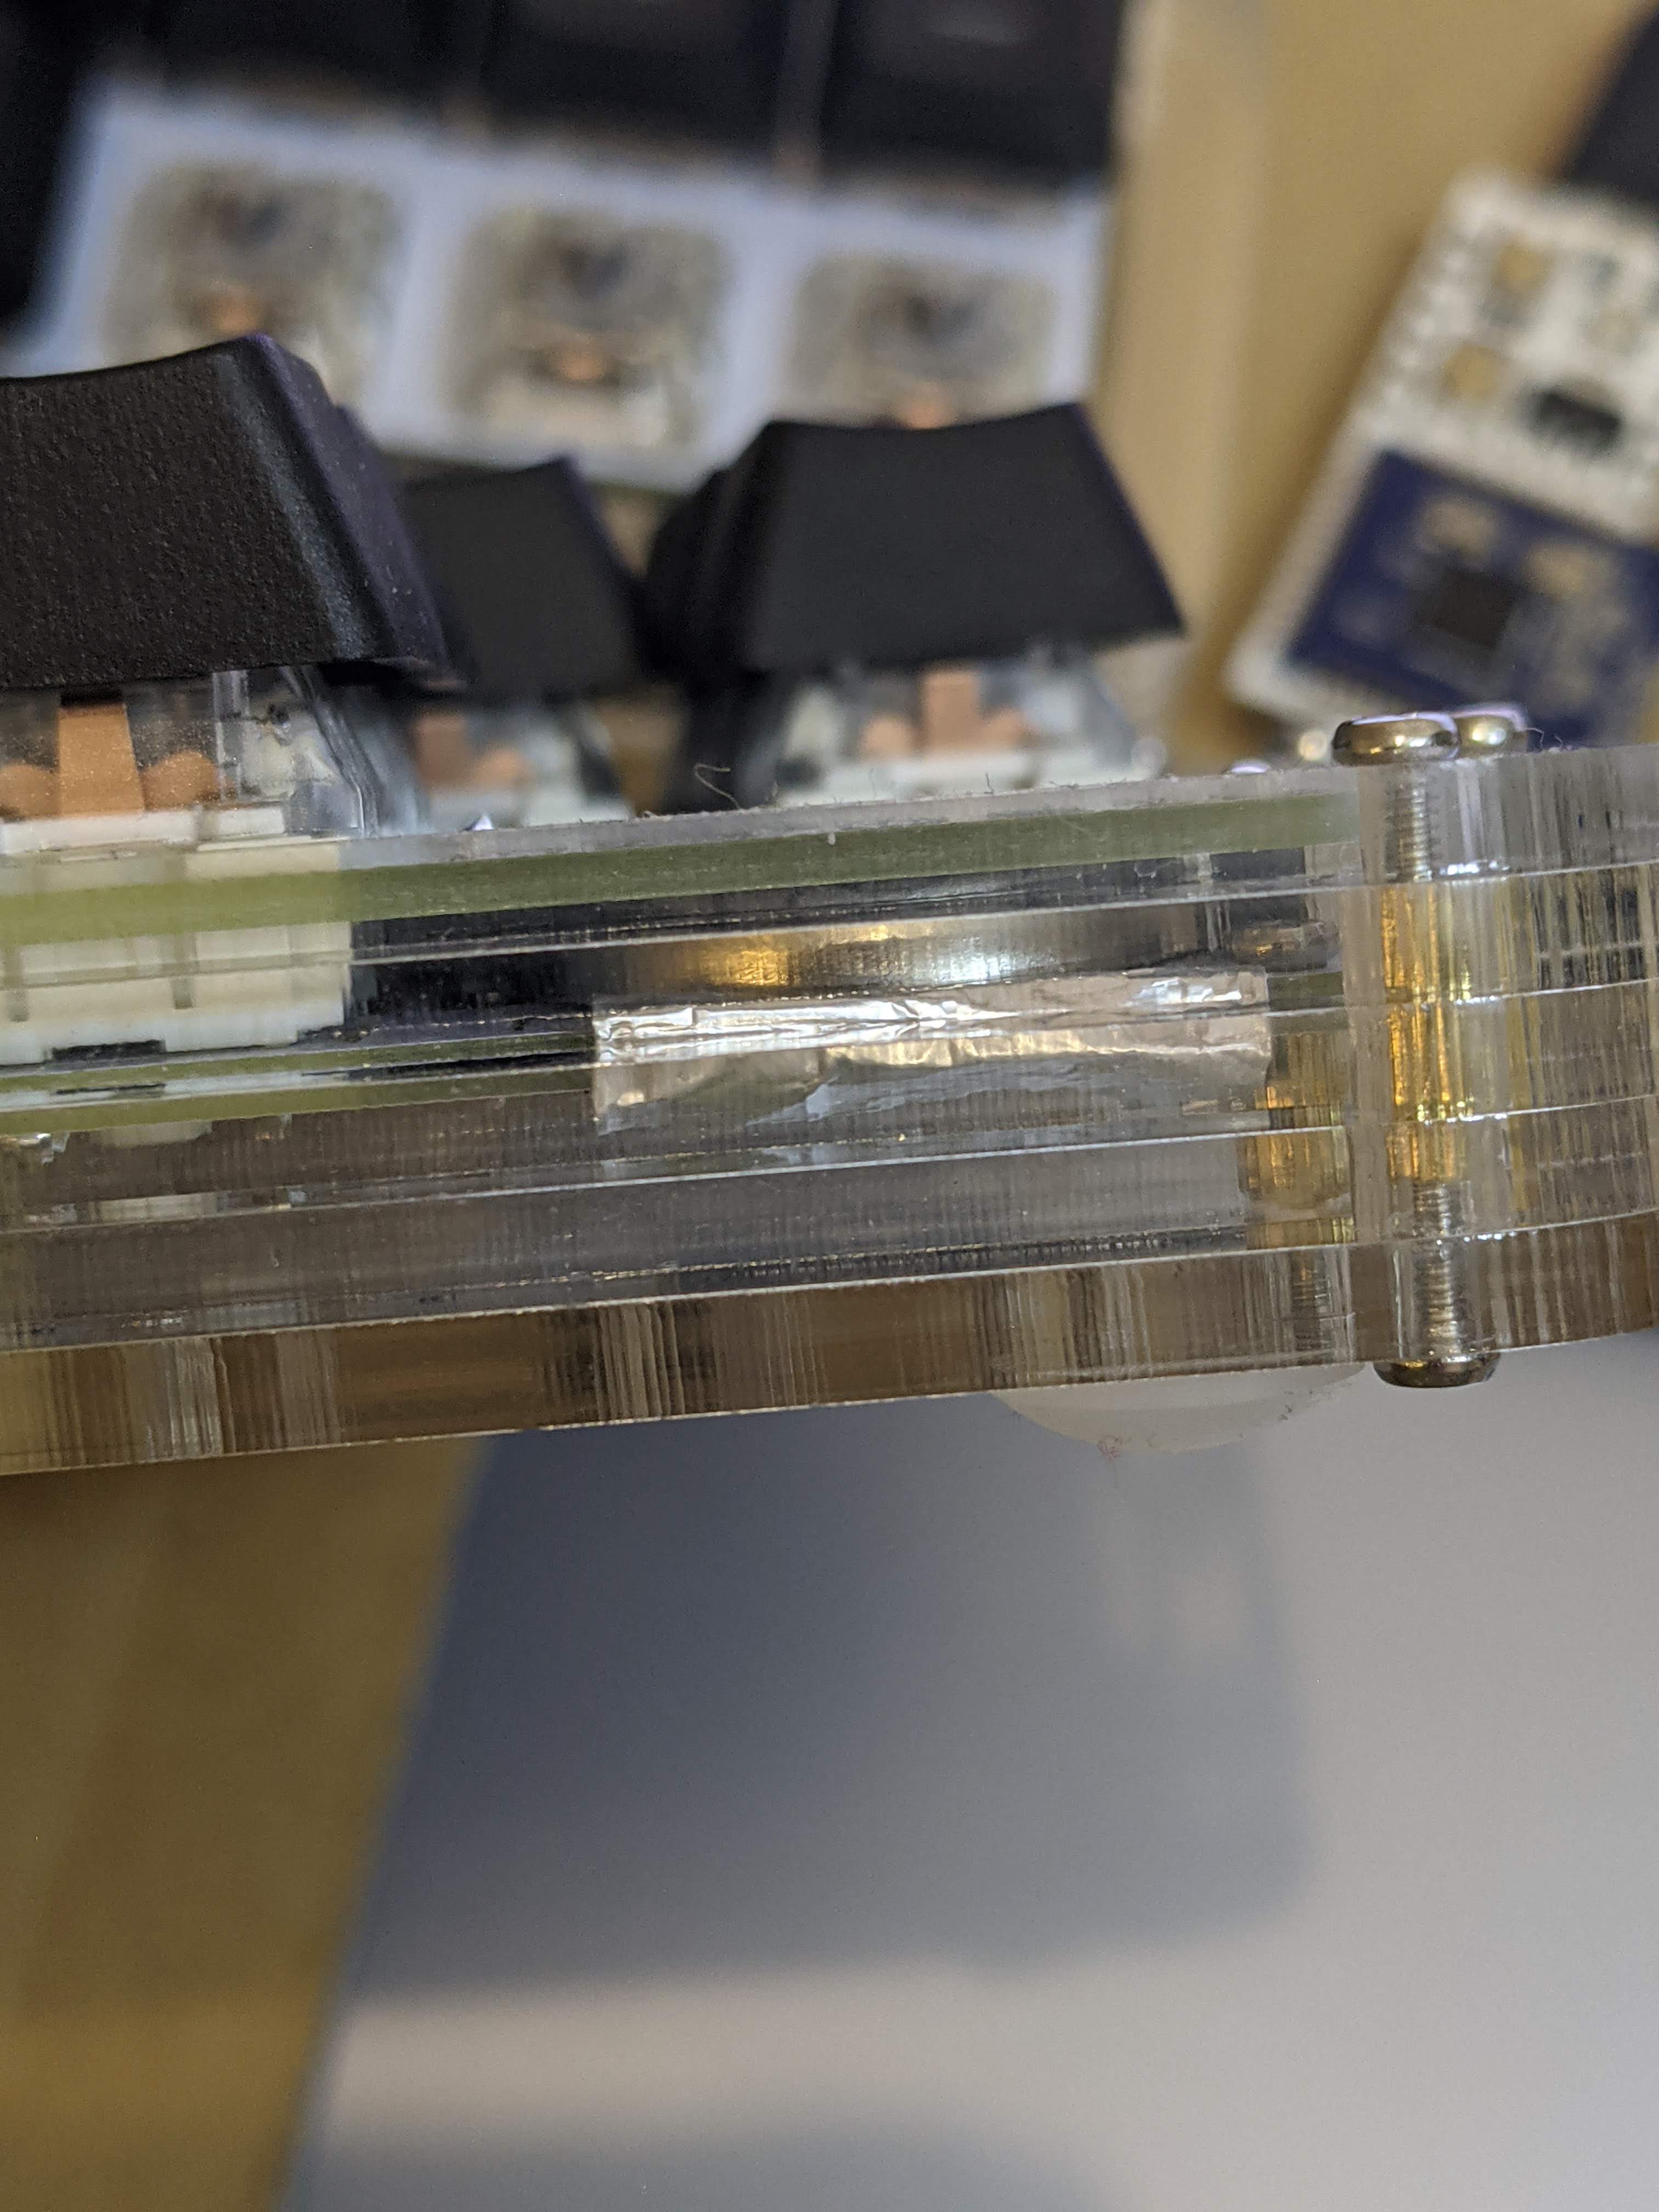
- The battery in the right side didn’t hold in the right half, I put aluminum foil under it to keep it in place.
Seems to work good now, but is it safe to do and to go like this in the long term? Maybe there is a better way to fix this?
Here is how the battery with foil looks.
The are + / - markers on the pcb, but I had to put batteries upside down to make it work (so battery’s plus is facing the plate marked with minus). Same on both sides. Am I interpreting these markings wrong? (it works, so not very important, I am just curious)
The green light doesn’t seem to work in the indicator led. Is this a defective led or a soldering defect? How to “debug” it? The blue and red lights work separately and together, producing magenta, but the green doesn’t work both on its own when combined with red or blue, it just stays off.
What do I do with several boards that I like a lot? I now have Ergodox EZ, Moonlander and Mitosis. Should I cycle between them daily or weekly?
